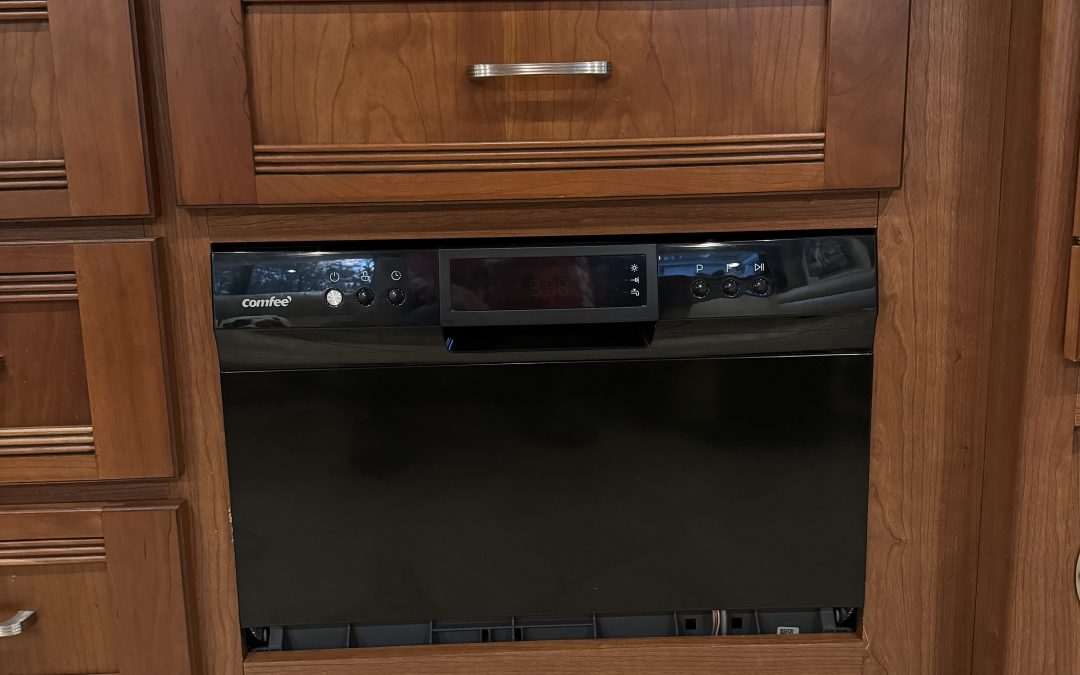
Installing a countertop dishwasher, as an undercounter dishwasher in a Winnebago DP motorhome
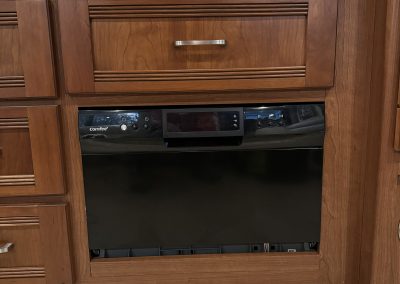
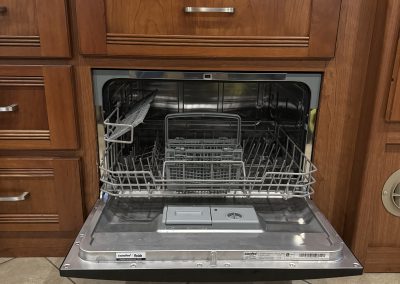
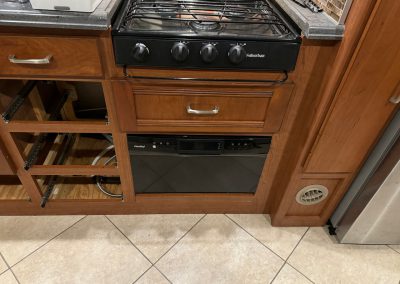
Adding a Comfee countertop dishwasher to a 2016 Itasca (Winnebago) Solei 38R
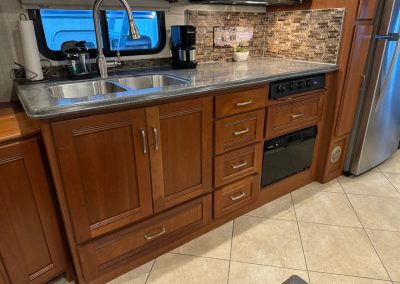
A lot of motor home owners say they wouldn’t install a dishwasher, but for us it was a great addition. My wife said losing two drawers was OK as there is a lot of storage above the sofa and dinette. We don’t use paper plates or plasticware unless we are boondocking. This installation is completely reversible. I didn’t have to cut the cabinet and we will save all the pieces we removed.
https://www.amazon.com/dp/B09ST4M8VF?ref=ppx_yo2ov_dt_b_product_details&th=1
- Remove the stove. There are two sets of screws one for the insert and one for the outer part. Mark which screw holes are because it’s hard to tell when you put it back.
- Remove the under-stove drawers from their slides by pushing on the tabs on each one. One tab goes up, one goes down.
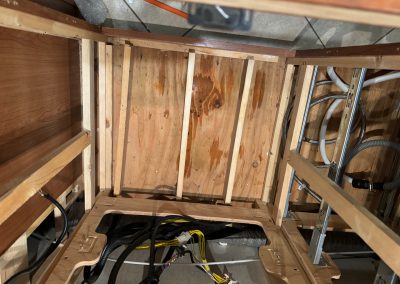
- Remove the rails for all the drawers under the sink. You will be putting back the top set when you are done.
- Remove the remaining drawers to give you more room to work. Leave the rails in place.
- Remove the divider between the first and second drawer and the second and third drawer. Mark where they go and you will be putting back the upper one. The top of the dishwasher will be just below this divider.
- I had to remove the cover from the dishwasher in order for it to fit between cabinet stiles.
- When I was all installed I added felt insulation around it to muffle the noise. https://www.amazon.com/dp/B0C5LBZM7K?ref=ppx_yo2ov_dt_b_product_details&th=1
- Remove the panel below the door on the dishwasher. This will allow it to slide forward and fit in the opening. I’m still working on how to close this gap. I may cut black plexiglass and add it. If I can get the woodgrain vinyl I may cut a piece to fit and cover it to match.
- Test fit the dishwasher. It will be too low so you will have to measure carefully and add a floor for it to sit on. I ripped down three 1×4’s and use 1/2 plywood on top. I left room for some heavy rubber pads that came in a tool cabinet. The top of the dishwasher is about 1/8th of an inch below it. Just enough for the door to open.
- I made my floor tight enough that it fit down on the floor in the opening. I didn’t screw it in but could have. I glued and screwed the ripped 1/4’s to the plywood.
- Use an on surface electrical outlet to replace the junction box. Turn the breakers off before working on it. 🙂 https://www.lowes.com/pd/Wiremold-700-Series-1-Piece-White-Raceway-Electrical-Box/3277047
- I used a PEX T valve to insert into the hot water line under the kitchen sink. I bought a PEX clamping tool. You can user Shark Bite connectors. https://www.amazon.com/gp/product/B0C5WH6QFX/ref=ppx_yo_dt_b_search_asin_title?ie=UTF8&th=1
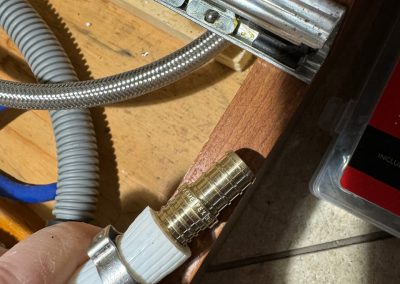
- I bought a universal dishwasher supply hose at Lowes. The tied into the T-valve and onto the back of the dishwasher. https://www.homedepot.com/p/Apollo-1-2-in-Chrome-Plated-Brass-PEX-B-Barb-x-3-8-in-Compression-Quarter-Turn-Dishwasher-Tee-Valve-APXVT121238/305455439
- The input hose uses a standard garden hose junction. Use this hose to connect to the PEX tee valve. https://www.homedepot.com/p/Everbilt-3-8-in-COMP-x-3-8-in-COMP-x-60-in-Universal-Stainless-Steel-Dishwasher-Connector-7223-60-38-6E-EB/205854141
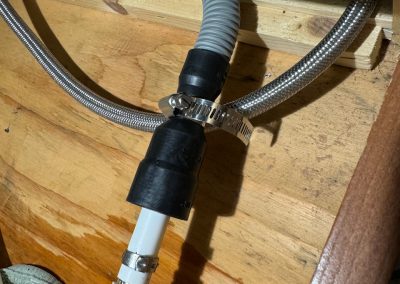
- Replace the tailpiece under the sink with one that has a dishwasher drain outlet. https://www.lowes.com/pd/Keeney-1-1-2-in-Plastic-Direct-Connect-Branch-Tailpiece-7-8-in-OD-Outlet/1088263
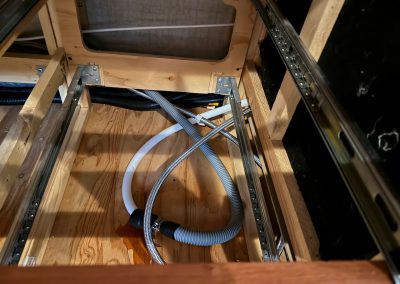
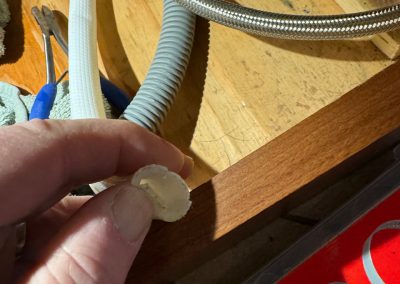
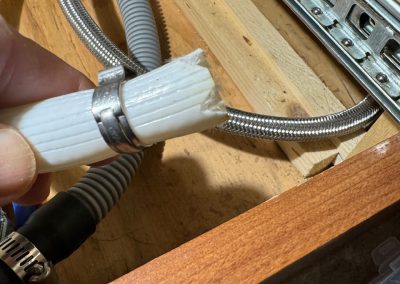
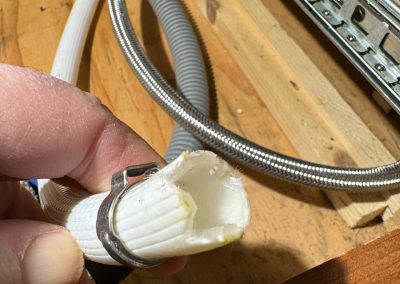
- Hooking up the drain line was the biggest PITA in the job. Nothing fits the connector on the back of the dishwasher. I cut the factory hose about 1 foot from the sink connector. Use a PEX to polybutylen connector to add a foot of PEX to the factory drain line you cut. Make four 1/8″ cuts on the end of the factory hose and heat with a hair dryer to get it to slide on to the factory hose. Clamp with a PEX clamp on both sides. https://www.homedepot.com/p/Apollo-1-2-in-Brass-PEX-B-Barb-Polybutylene-Coupling-APXBC1212/301541080
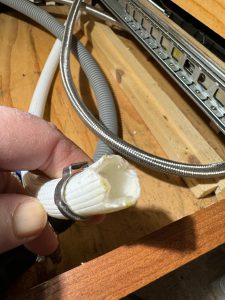
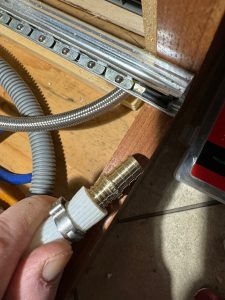
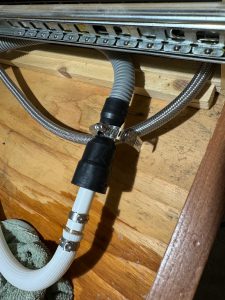
- Attach the larger end of this hose: https://www.homedepot.com/p/Everbilt-6-ft-Corrugated-Dishwasher-Hose-HRBDIS06EB/206578686 to the drain tailpiece.
- Use the slide the smaller end over the PEX tubing you added to the drain and clamp.
- Mount the dishwasher in place and test run it checking for leaks.
- Reinstall the drawer divider
Materials List (still editing)
- PEX Clamping Tool https://www.amazon.com/gp/product/B0C5WH6QFX/ref=ppx_yo_dt_b_search_asin_title?ie=UTF8&th=1
- Dishwasher https://www.amazon.com/dp/B09ST4M8VF?ref=ppx_yo2ov_dt_b_product_details&th=1
- 2′ 1/2 PEX tubing
- PEX Tee Valve https://www.homedepot.com/p/Apollo-1-2-in-Chrome-Plated-Brass-PEX-B-Barb-x-3-8-in-Compression-Quarter-Turn-Dishwasher-Tee-Valve-APXVT121238/305455439
- Universal Dishwasher Drain Hose https://www.homedepot.com/p/Everbilt-6-ft-Corrugated-Dishwasher-Hose-HRBDIS06EB/206578686
- Universal Dishwasher Supply hose (6′) https://www.homedepot.com/p/Everbilt-3-8-in-COMP-x-3-8-in-COMP-x-60-in-Universal-Stainless-Steel-Dishwasher-Connector-7223-60-38-6E-EB/205854141
- polybutylen to PEX inline connector https://www.homedepot.com/p/Apollo-1-2-in-Brass-PEX-B-Barb-Polybutylene-Coupling-APXBC1212/301541080
- Flat mounting plates
- Plywood for platform
- 1×4 or 2×4 for under dishwasher platform.
- Undersink tailpiece with 5/8 stub. Keeney 1-1/2-in Plastic Direct Connect Branch Tailpiece 7/8-in OD Outlet in the Under Sink Plumbing department at Lowes.com


Recent Comments